How to Draw a Side Tree Sttep by Step
There are few things more relaxing than taking it easy in the shade of a nice big tree. It can also be really great to just take in the sight of a tree in a field or forming a beautiful forest.
Trees can also come in many different types, shapes and colors which makes them even more beautiful.
If you're a tree lover, maybe you've wondered how you can learn how to draw a tree If you have, then this guide is for you!
Drawing can be so much easier if you break it down into manageable steps, and that's just what we've done to help you along.
We created this easy step-by-step guide on how to draw a tree in 7 easy steps to have you drawing your own trees in no time.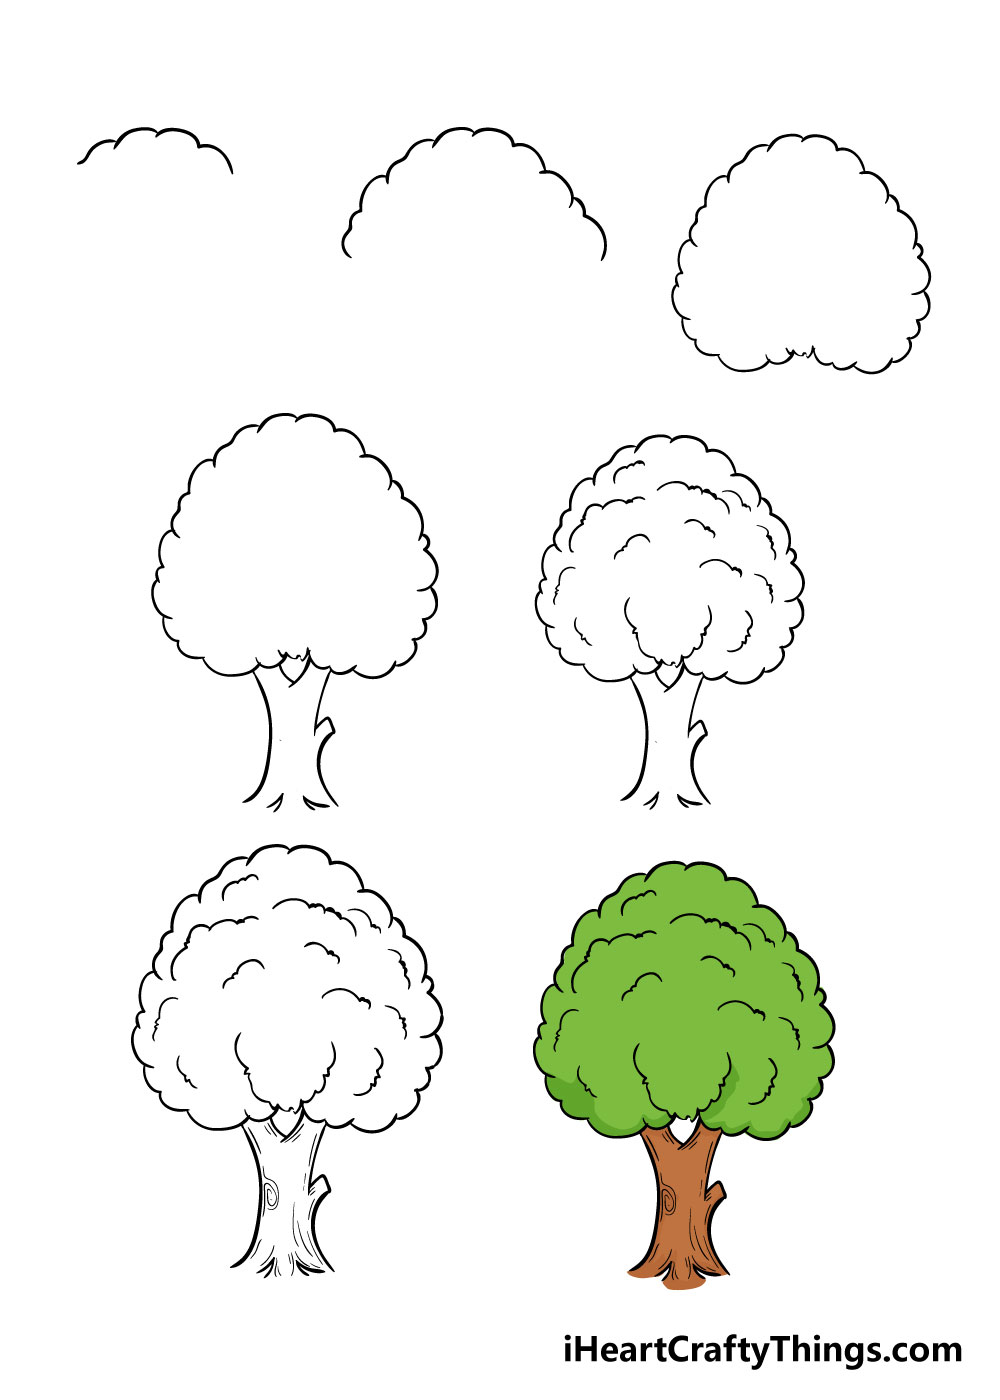
What's in this Blog Post
- How to Draw a Tree – Let's get Started!
- Step 1
- Step 2 – Draw in more of the treetop
- Step 3 – Next, draw in the rest of the leaves
- Step 4 – Now draw in the tree trunk
- Step 5 – Next you will be adding the leaf details
- Step 6 – Now draw in the final trunk details
- Step 7 – Finish it off with some color
- Your Tree Drawing is Complete
How to Draw a Tree – Let's get Started!
Step 1
The first step in this guide on how to draw a tree is to draw in the top of the tree. To do this, draw in a few horizontal curved lines that connect with each other.
You could draw these with a pen or darker pencil as they will be showing up in the final drawing.
If you find yourself struggling to get the right shape, then you could use a lighter pencil first until you're happy with it.
Step 2 – Draw in more of the treetop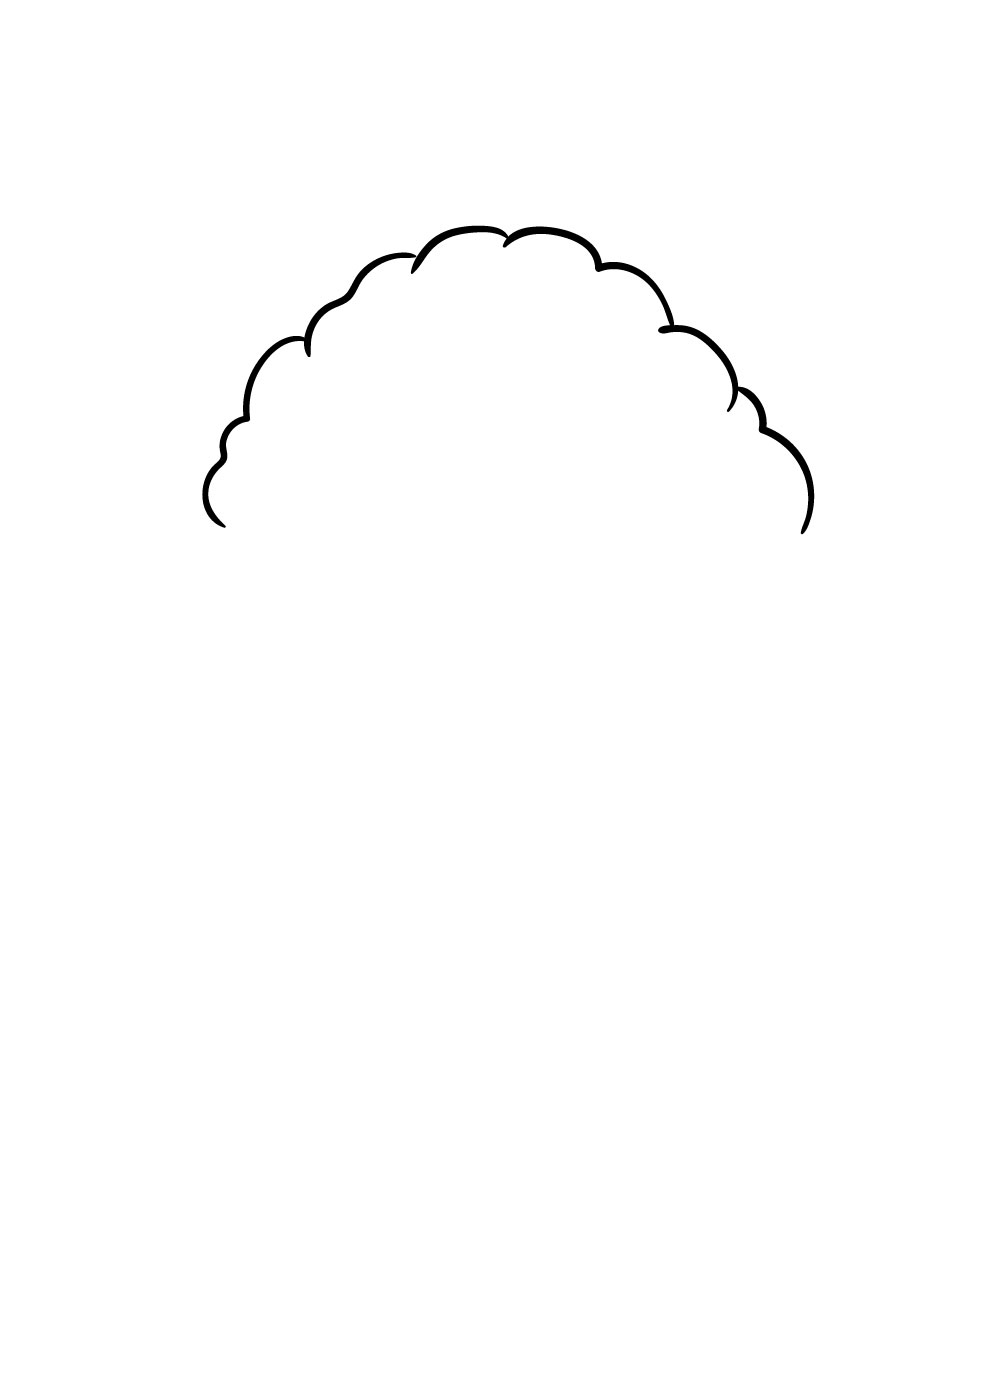
For this second step of your tree drawing, you will be adding in more of the top of the tree. Using the reference image, draw in more of the curved lines down the side.
Made sure they flow out a bit to give the tree a nice thick top!
Step 3 – Next, draw in the rest of the leaves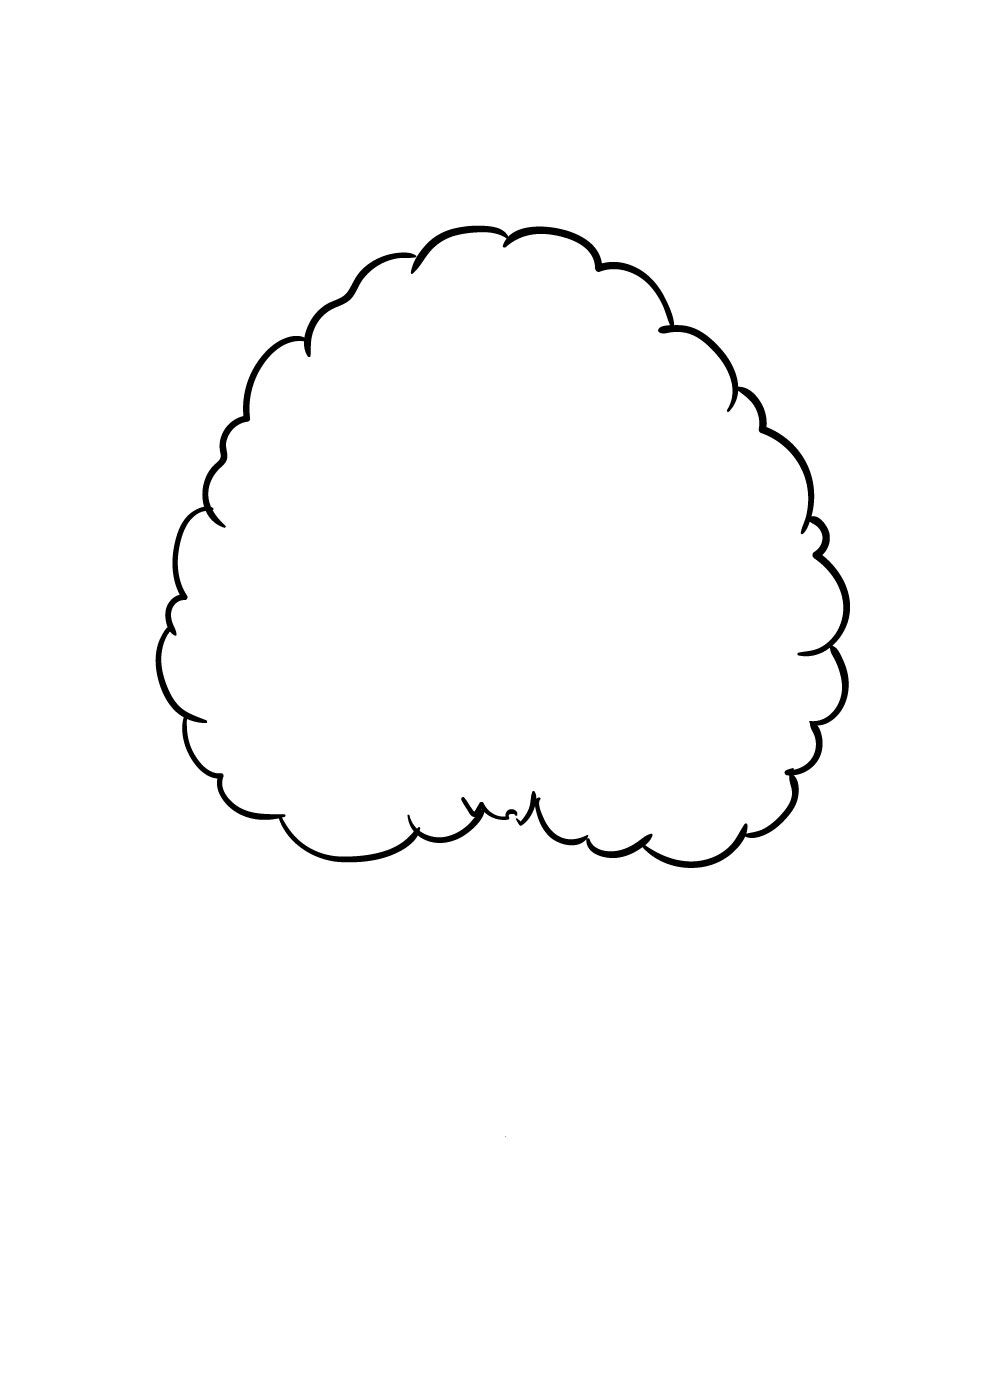
The next step of your tree drawing will have you adding the rest of the leaves. Using the same wavy lines, draw in the rest of the treetop, raising it in the center a bit as the trunk will be going in this area.
For this stage, using the reference picture will be especially helpful. For this stage as well, it could also be beneficial to use a lighter pencil before going over it in pen or a darker pencil.
If you do use a lighter pencil to draw over, make sure that your pen ink is dry before you erase the guiding pencil lines!
Step 4 – Now draw in the tree trunk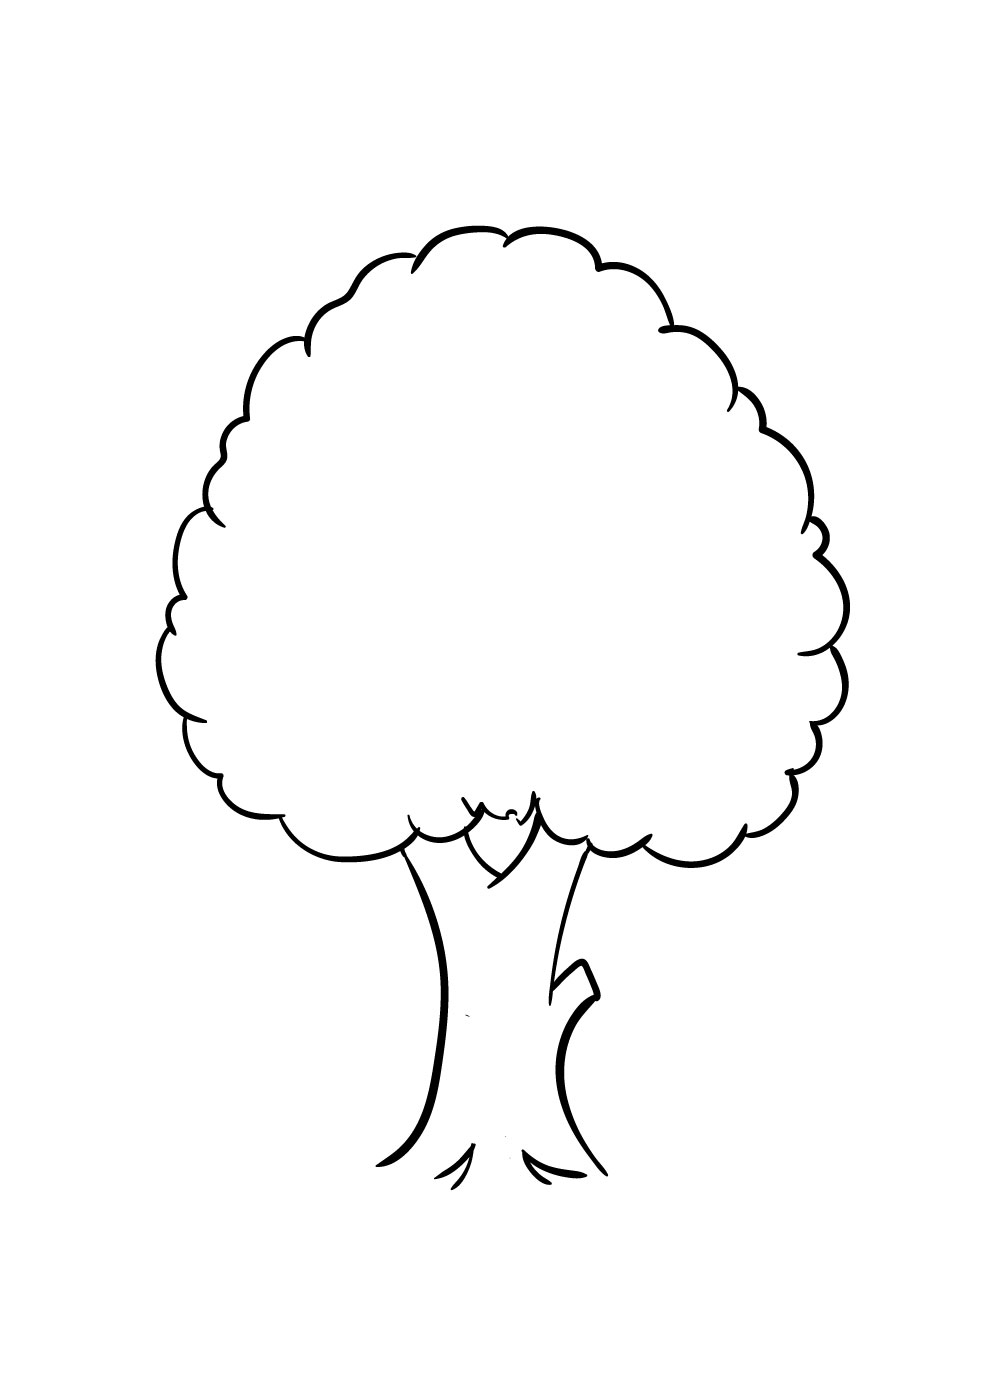
You've finished the leaves of the tree for now, so for the next part you'll be drawing in the tree trunk.
This is probably the trickiest part of this tree drawing, but it doesn't have to be tricky if you take it slow and closely reference the image we have here.
Start off by drawing a curved line down from the leaves to make the left side of the trunk. Draw a much shorter line down the right side, and then draw out the cut branch as you see it in the reference image.
Finally, you just need to draw the rest of the line down from the cut branch. For the next bit, simply draw two lines near the top of the center of the trunk to make a gap as you can see in the image.
All that remains is to add a few little lines at the base of the trunk and you're ready for the next step!
Step 5 – Next you will be adding the leaf details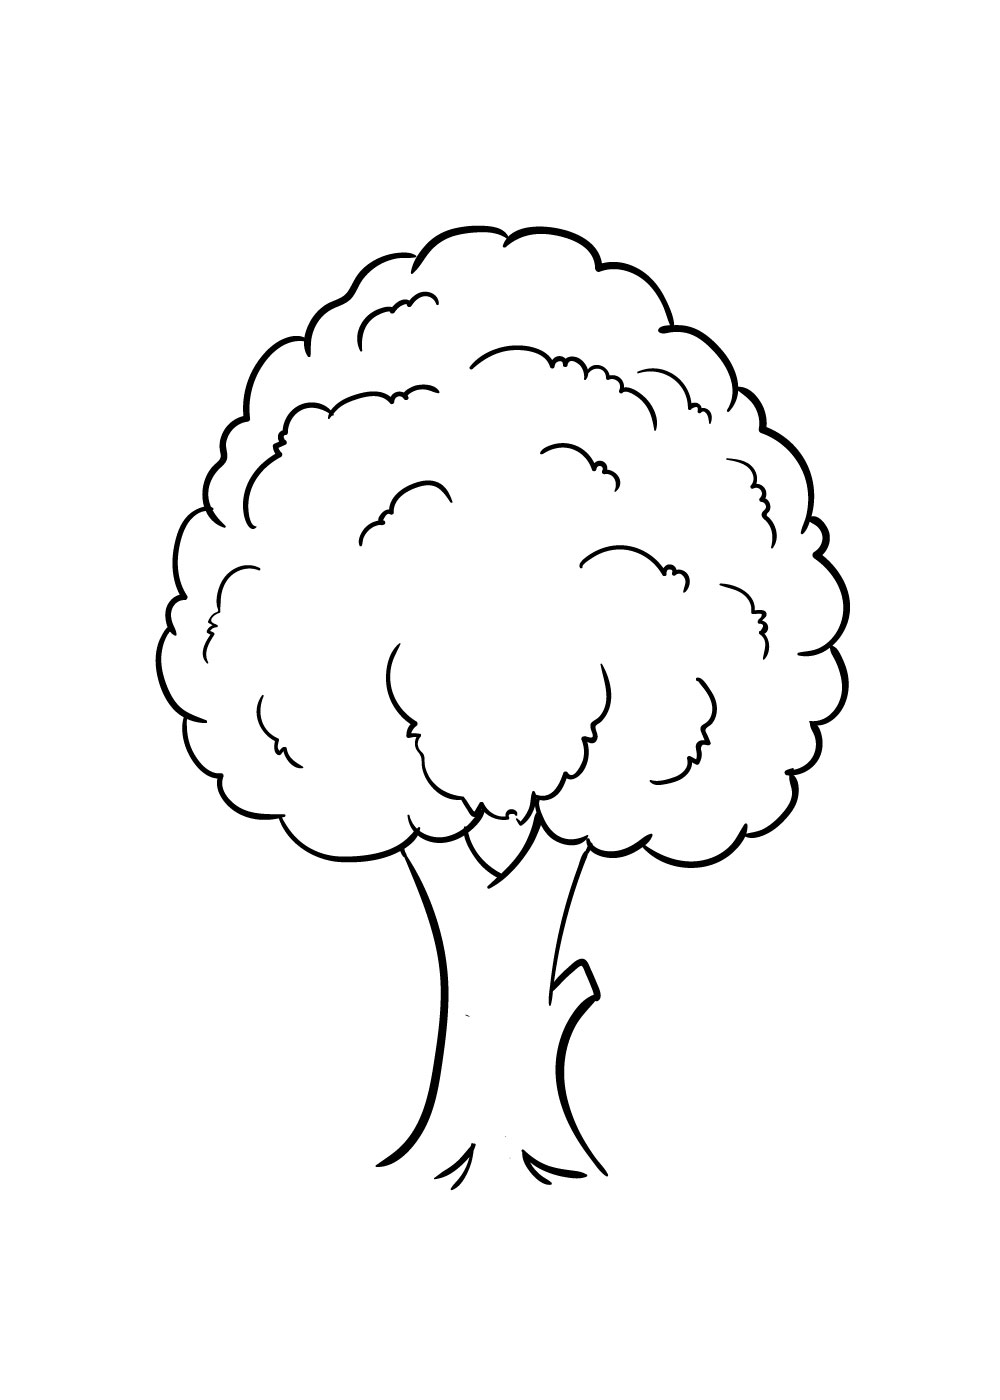
Your tree drawing is almost complete at this point and just needs some details. For this step, we will be adding lots of small, curved lines to the interior of the treetop.
You can do these in the same way they appear in the picture, but you can also add lines as you wish!
There isn't really a wrong way to do these kinds of details, and you should add them in a way that looks great to you.
Step 6 – Now draw in the final trunk details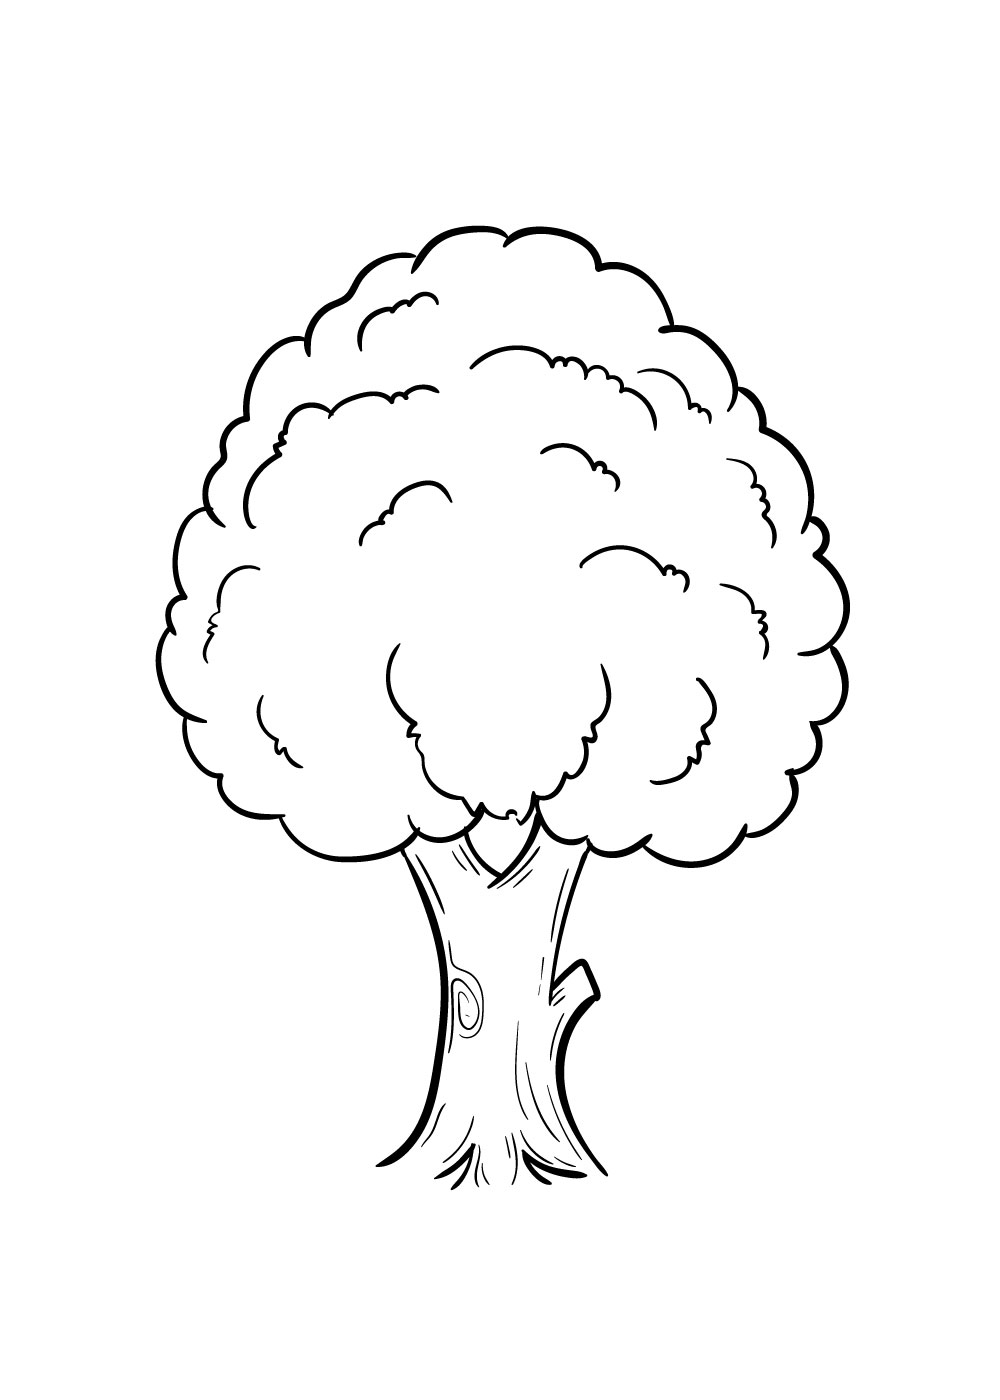
At this point, you've almost finished your journey of learning how to draw a tree! For the final trunk details, we will be adding mostly thin, straight lines going down the trunk and a few wavier ones to suggest knots in the tree.
This is another step where you could copy the lines in the reference image or use them as inspiration for your own lines of your tree drawing.
Step 7 – Finish it off with some color
With that done, you've finished your awesome tree drawing! You're not quite done yet, though. There's one more fun step, and that's to color in your tree.
For this step, you should really let your creativity flow! You could go for a nice bright green tree or have some beautiful reds, oranges and yellows for a stunning Fall tree.
It's really fun to experiment with different art mediums as well. You could use tools like acrylic paints, watercolors, colored pens or pencils along with any of your favorite mediums to create some beautiful images!
Once your tree drawing is finished and colored in, you should hold your head up high because you've just learned how to draw a tree!
Your Tree Drawing is Complete
We really hope that this step-by-step guide on how to draw a tree in 7 steps was not only helpful but also lots of fun to use!
Drawing something new can often feel a bit intimidating because you don't need to start. That's why we create these easy guides for you, as they can really make the process of drawing fun and easier.
Now that you've drawn your tree, you can show your creativity even further with your own details!
Apart from choosing your colors, you could also add in details like fruit and birds into it. You could even draw in a beautiful background, perhaps with a rainbow or someone lying under the tree.
The possibilities for you to personalize your tree with your own details are pretty much endless!
Once you've finished and colored in your beautiful tree drawing, we hope that you will share it to our Facebook and Pinterest pages for us to admire!
We always love to see the creativity and artistic skills you all have, so we would love to see how your amazing trees come out.
grazianofoxys1977.blogspot.com
Source: https://iheartcraftythings.com/tree-drawing.html
0 Response to "How to Draw a Side Tree Sttep by Step"
Post a Comment